Hello friends!
I'm a little later than I planned posting this today, so as I sit t the computer the afternoon sun is coming through my craft room window. It's still a joy to have an entire room for my crafting space. The fall colours are still in evidence outside my window, but today has definitely been cooler, and it's never too early to get started preparing for Christmas (in my humble opinion!).
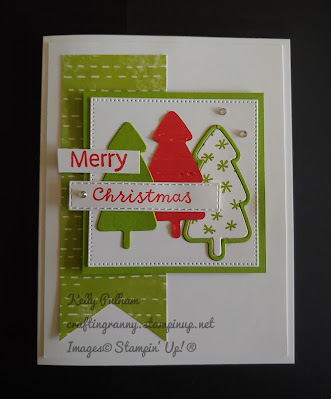
All of the cards used the Spruced Up Bundle plus the Celebrate Everything Designer Series Paper. For a materials list, you can check out the projects on my web page. The first two cards I have to share are the cards we made at my October Christmas Card class. The ladies loved them, and I bet you will too.
Measurements:- Basic White Thick Cardstock 5 1/2" by 8 1/2", scored at 4 1/4"
- Basic White Cardstock 2 pieces 4" by 5 1/4", 3" square for die cutting largest stitched square from the Stylish Shapes dies, 3/8" by 1 1/2" strip for stamping MERRY, 1" by 3" strip for die cutting stitched rectangle from the Stitched Rectangle dies, 2 pieces 1 1/2" by 2 3/4" for die cutting 2 white Christmas trees, one for inside card and one for card front (use only the inside of the tree)
- Poppy Parade 1 1/2" by 2 3/4" to die cut tree, then emboss in Stripes 3D Embossing Folder
- Granny Apple Green 3" square, 2 pieces 1 1/2" by 2 3/4" to die cut trees, use outside pieces to fram white trees, and use inside of one tree for the card front
- Granny Apple Green DSP 1 3/4" by 4 3/4", stripes running horizontally as shown above, cut notch in one narrow end. Measurements:
- Granny Apple Green Card Base 5 1/2" by 8 1/2", scored at 4 1/4", 3 1/2" by 4" scored at 3", 3/4" by 1 3/4"
- Basic White Cardstock 4" by 5 1/4", 2 1/2" by 3 1/4" embossed with Stripes 3D Embossing Folder,1 3/4" by 3 1/2" to die cut ornament (use inside portion), 2" by 3 1/8", 1/2" by 1 1/2"
- Poppy Parade Cardstock 1 3/4" by 3 1/2" to die cut ornament (use outside portion)
- Horizontal Striped DSP 2" by 3 1/8"
- Ornament DSP 2 3/4" by 3 3/4"
- Granny Apple Green 5 1/2" by 10 3/4", score at 1 5/8", 3 1/4", 4 7/8", 6 1/2"; 3" by 5 1/2" scored at 2 3/4", 2 1/4" by 3" to die cut wider ornament, 1 1/2" by 2" to die cut gift
- Poppy Parade 1/1/2" by 2" to die cut gift, 1 1/2" by 2" to die cut round ornament
- Basic White 4" by 5 1/4", 2 1/4" by 3" to die cut wider ornament, 2 pieces 2 9/16" by 2 13/16", tiny piece to stamp and die cut star for tree, 2 pieces 1 1/16" by 1 3/16" to back the gifts so the dsp will stay put and one gift can be popped up with a dimensional
- Horizontal Striped DSP cut 2 pieces at 1 7/16" by 2 5/16", 1 1/2" by 2" to die cut gift
- Polka Dot DSP cut 2 pieces at 1 7/16" by 2 5/16", 1 1/2" by 2" to die cut gift, 1 1/2" by 2" to die cut round ornament
- Granny Apple Green 5 1/2" by 8 1/2" scored at 4 1/4", 1 3/4" by 2 3/4" to die cut thin ornament (use outline)
- Basic White Cardstock 4" by 5 1/4", 3 1/2" by 4 3/4", cut 2 at 1" by 2 1/4" for die cutting light strings
- Poppy Parade Cardstock 2 3/4", 2 1/4" by 3" to die cut wider ornament, 1 1/2" by 2" to die cut round ornament
- Crushed Curry Cardstock (for inside card) 2" by 2" to die cut 3 stars
- Diagonal Striped DSP 4" by 5 1/4"


No comments:
Post a Comment
Thanks so much for commenting. I'm glad you shared.